ReadySuite Options
Use the ReadySuite Options dialog box to customize your display and manage settings.
The ReadySuite Options menu bar contains the following options:
To open ReadySuite Options
- In the ReadySuite ribbon, click File.
- On the ReadySuite Options dialog box, click Options.
General
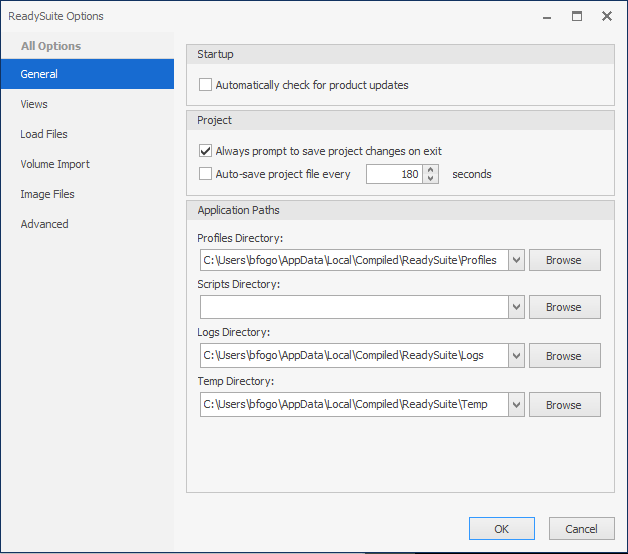
Startup
- Automatically check for product updates: If selected, ReadySuite alerts you to any new versions of the application each time you start the application.
If cleared, you can manually check for product updates on the ReadySuite Options dialog box (ReadySuite ribbon > File) by clicking Check for Updates in the Tools for ReadySuite section.
Project
- Always prompt to save project changes on exit: If selected, if a project has unsaved changes, ReadySuite prompts you to save changes before closing the application.
If cleared, no prompt appears before closing the application, increasing the potential of losing unsaved data. - Auto-save project file every [#] seconds: If selected, when a ReadySuite project (.rsp file) is open, ReadySuite automatically saves that file every duration of the selected seconds.
If cleared, open ReadySuite files must be manually saved (default setting).
Application Paths
- Profiles Directory: Default profiles directory used by ReadySuite throughout the application in profiles, scripts, field maps, and field lists.
- Scripts Directory: Default scripts directory used by ReadySuite throughout the application for any scripts loaded from a share. For more information, see Script Location.
- Logs Directory: Default logs directory used by ReadySuite throughout the application. ReadySuite support may request files from this directory for diagnosis.
- Temp Directory: Default temp directory used by ReadySuite to support various processes and exports when needing to save temporary data that can later be deleted or removed.
- Projects Directory: Default project directory used by ReadySuite to support various project types.
Views
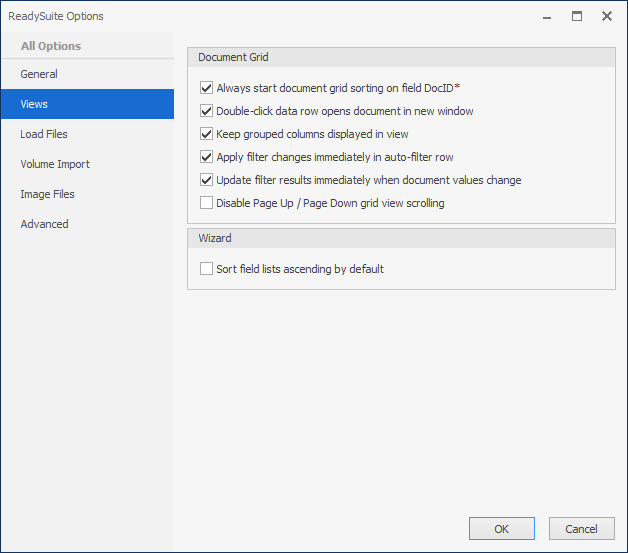
Document Grid
- Always start document grid sorting on field DocId*: If selected, ReadySuite will always sort the Document Grid View after an import using the built-in DocId field.
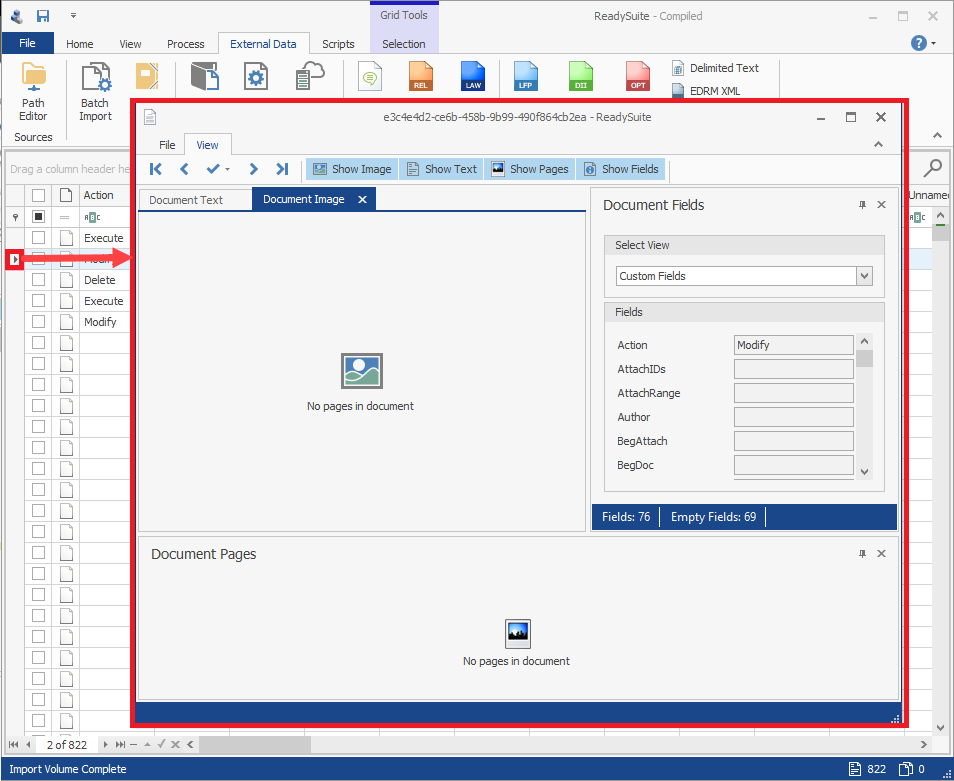
If cleared, no default sorting is applied to the Document Grid View after an import. You can manually sort the Document Grid View after an import using a fields column header. (Hint: You can use the LoadOrder field to sort by an item's original creation order in the application.) - Double-click data row opens documents in new window: If selected, ReadySuite opens a single document record in a new window when you double-click the left edge of a row.
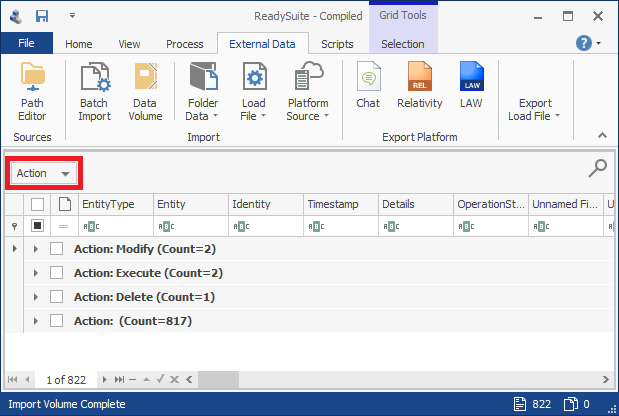
If cleared, it does not. - Keep grouped columns displayed in view: If selected, a grouped column appears in both the Document Grid View header and column header.
- Apply filter changes immediately in auto-filter row: If selected, ReadySuite begins filtering columns as each character is typed in the filter row.
- Update filter results immediately when document view change: For more information, see Delaying Filters.
- Disable Page Up / Page Down grid view scrolling: If selected, pressing
Page UpandPage Downon your keyboard will not move between records on the Document Grid View.
If cleared, pressingPage UpandPage Downon your keyboard moves vertically between records on the Document Grid View.
Note: For large load files, clearing this option can decrease the time required to load the Document Grid View to have faster performance
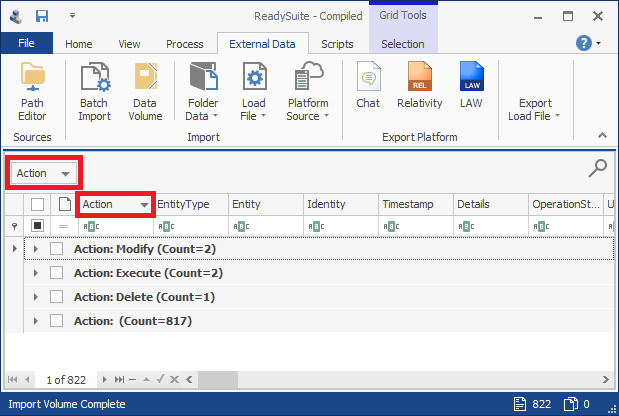
If cleared, a grouped column appears only in the Document Grid View header.
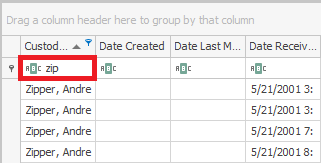
If cleared, ReadySuite does not filter a column until you press Enter or move the cursor off the row after typing your filter string.
Note: If you have a load file with millions of records, clearing this option can decrease lag time when filtering columns
Wizard
- Sort field lists ascending by default: If selected, ReadySuite sorts field lists on wizards and scripts in ascending alphabetical order.
If cleared, ReadySuite sorts field lists on wizards and scripts according to the order in which the field was created.
Load Files
Fields
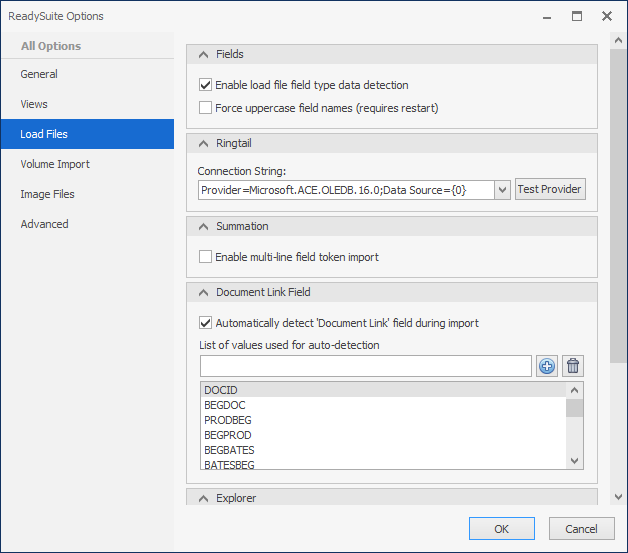
- Enable load file field type data detection: If selected, ReadySuite will automatically attempt to determine the type of data in a field.
If cleared, ReadySuite will automatically assume the data type of a field to beText. - Force uppercase field names (requires restart): If selected, any time a field is created in ReadySuite, the name will be created in uppercase.
Ringtail
- Connection String: For more information, see Ringtail Setup. This setting is used to connect to Microsoft Access when opening or creating Ringtail load files.
Summation
- Enable multi-line field token import: If selected, any token that has a dash end with multiple lines between it can be parsed.
If cleared, ReadySuite ignores multi-line field tokens during import and fields are not created.
Document Link Field
- Automatically detect 'Documentation Link' field during import: For more information, see Link Field Option.
Explorer
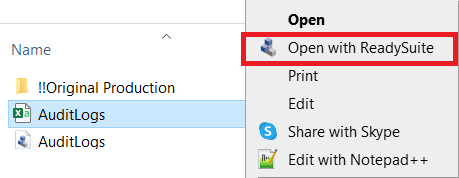
- Enable 'Open with ReadySuite' context menu: If selected, when you right-click on a load file, Open with ReadySuite appears in the shortcut menu.
- Default file types to ReadySuite: Select the type(s) of file you want to enable to open with ReadySuite. When you double-click one of these file types, ReadySuite opens and loads the selected file.
Volume Import
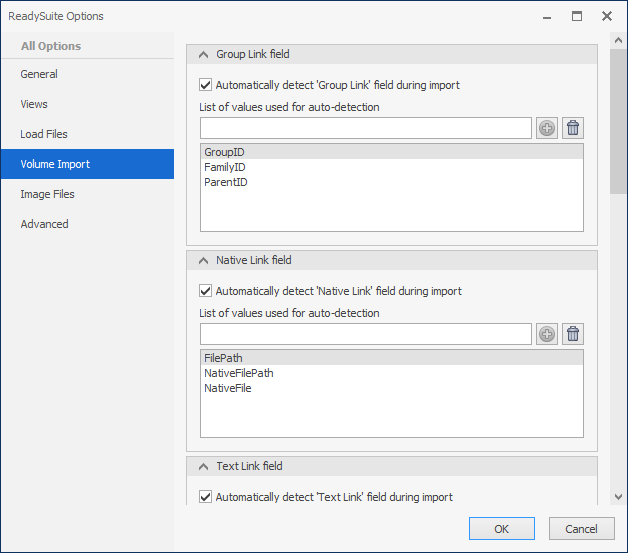
- Automatically detect 'Group Link' field during import: If selected, ReadySuite looks fields in order as they appear in the List of values used for auto-detection when trying to determine the Group Link value throughout the ReadySuite application (example, ReadySuite displays the first field found from the List of values used for auto-detection in the Family Link drop list on wizards.)
Note: Group Link and Family Link are synonymous and used interchangeably.
If cleared, none of the values listed for auto-detection are searched (example, ReadySuite displays No Field Selected... in the Family Link on wizards.)
- Automatically detect 'Native Link' field during import: If selected, ReadySuite looks fields in order as they appear in the List of values used for auto-detection when trying to determine the Native Link value throughout the ReadySuite application (example, ReadySuite displays the first field found from the List of values used for auto-detection in the Native Link drop list on wizards.)
If cleared, none of the values listed for auto-detection are searched (example, ReadySuite displays No Field Selected... in the Native Link on wizards.
- Automatically detect 'Text Link' field during import: If selected, ReadySuite looks fields in order as they appear in the List of values used for auto-detection when trying to determine the Text Link value throughout the ReadySuite application (example, ReadySuite displays the first field found from the List of values used for auto-detection in the Text Link drop list on wizards.)
If cleared, none of the values listed for auto-detection are searched (example, ReadySuite displays No Field Selected... in the Text Link on wizards.
Volume Detection
- Use the List of values used for auto-detection in the following sections to manage the Folder Option settings for the Data, Images, Natives, and Text on the Volume Setup page of the Volume Import wizard:
- Load Files / Cross Reference Files folder
- Image folder
- Native folder
- Texts folder

The List of values used for auto-detection in the Volume Detection section also informs advance detection in the following fields in the Resources section of the Volume Data page of the Volume Import wizard:
- Group Link
- Native Link
- Text Link
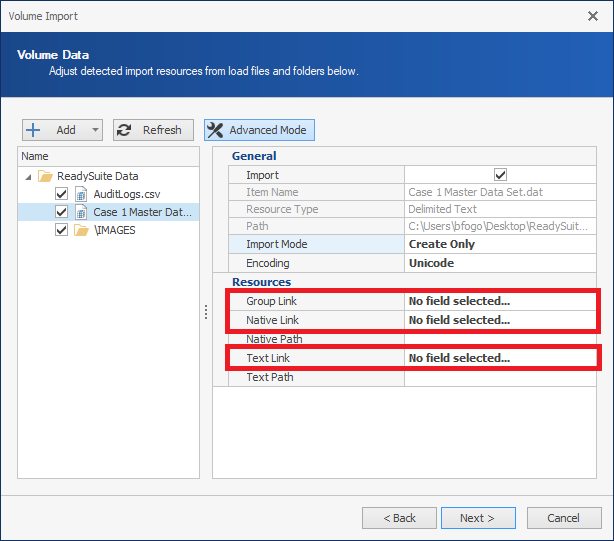
For more information, see Volume Import.
Image Files
Color Detection
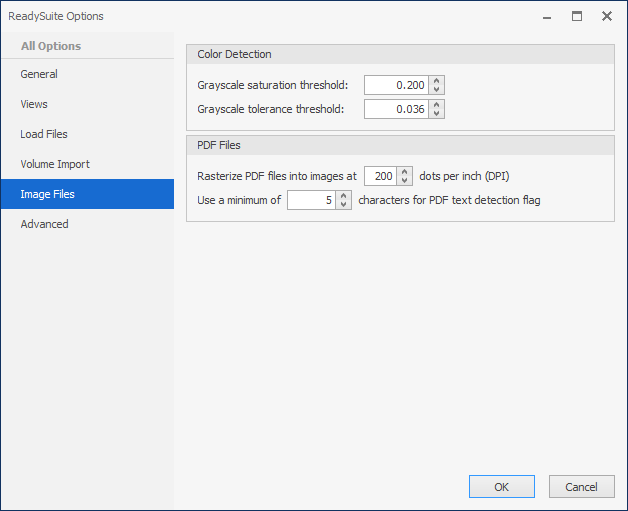
Use the Color Detection section to determine how much of an image is color and how much is black and white.
- Grayscale saturation threshold: Select the saturation threshold where a saturation less than the given value is regarded as gray. Valid values are from 0 to 1.0, with a default of 0.2.
- Grayscale tolerance threshold: Select the amount in percent that any given pixel color is off from pure gray. The higher the value, the more sensitive the command is to color. Lower values reduces color sensitivity. Valid values are from 0 to 1.0 with a default value of 0.036.
PDF Files
- Rasterize PDF files into images at [#] dots per inch (DPI): Select dots per inch (DPI) setting for ReadySuite to employ when converting PDFs to a TIFF image. (Default is
200DPI to balance image quality and system performance).
Increase to produce a larger file size with greater image quality at slower rate (example300DPI).Decreaseto produce a smaller file size with lesser image quality at faster rate (example,150DPI) - Use a minimum of [#] characters for PDF text detection flag: When used with the
HasTextandTextLevelfields, when running resource detection on a PDF and a PDF has text, select the threshold setting of minimum numbers of characters used by ReadySuite to determine if text is present in the PDF (default is5, meaning a PDF must contain five or more characters for ReadySuite to consider the PDF contains text).
Note: The PDF Tools script PDF Text Size Count can calculate the size of the text in the PDF.
Advanced
Performance
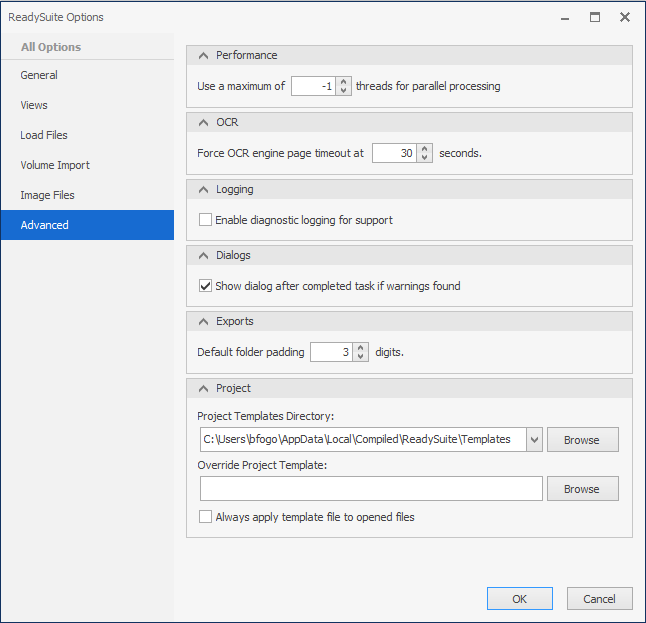
- Use a maximum of [#] threads for parallel processing: ReadySuite leverages all available cores for any tasks it's able to leverage for parallel processing (default of
-1, unlimited, is the recommended value). However, if tasks are slowing, it may be desirable to set a maximum number of threads. (For example, a four core machine, two threads for parallel processing may balance performance, network traffic or latency, and file operations.)
OCR
- Force OCR engine page timeout at [#] seconds: When ReadySuite is processing an OCR job, if no result has been produced from the OCR engine within the number of selected seconds, ReadySuite will skip that page and move to the next. (High resolution images required a larger amount of seconds to process, for example 90 to 180 seconds).
Logging
- Enable diagnostic logging for support: If selected, ReadySuite enables more data in the log files it generates. (ReadySuite support may request that you select this option.)
Dialogs
- Show dialog after completed task if warning found: If selected, ReadySuite displays a dialog box noting any warnings present after processing a task.
Exports
- Default folder padding [#] digits: When using incremental folder naming, select the number of digits to prefix a folder name.
Project
- Project Template Directory: Select the default template directory ReadySuite attempts to open from and save to when working with templates. (For more information, see Using Templates.)
- Override Project Template and Always apply template to opened files: For more information, see To apply a default project template for any new session or project in ReadySuite in Using Templates.