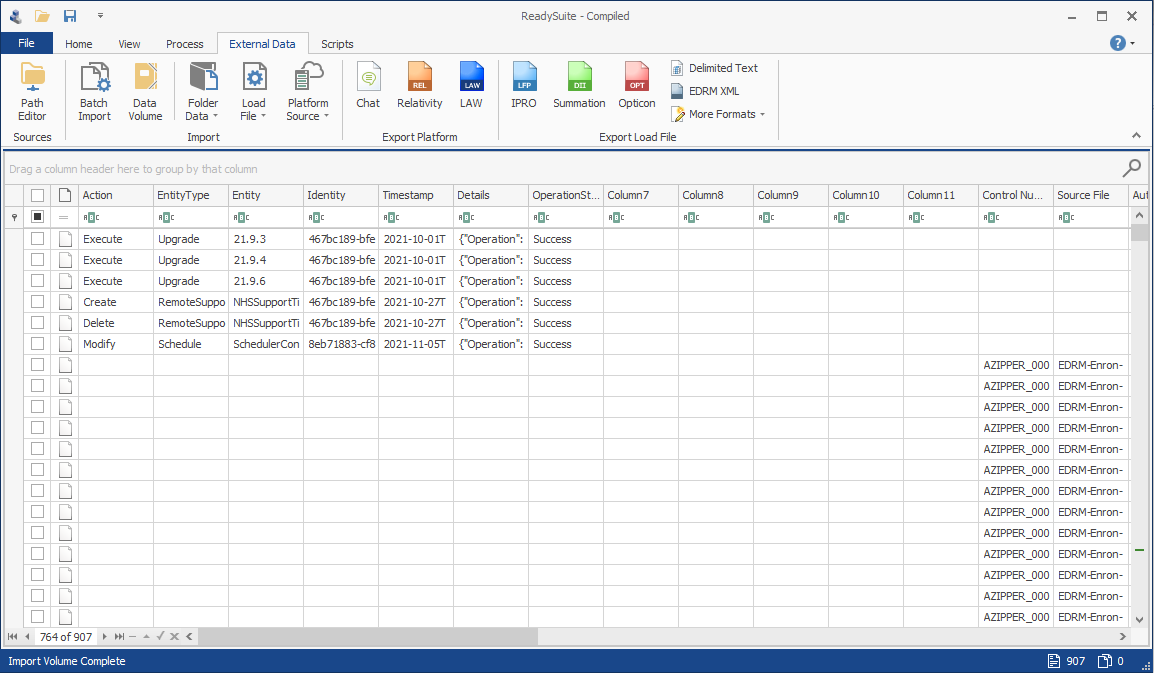
Volume Import
Document volumes can be imported and verified with the Volume Import wizard. With the Volume Import wizards, you can create records with a load file (such as an Opticon file), overlay a metadata file (such as a Concordance DAT file), run validation, and generate reports on the contents and files in the volume.
To import a multiple load file as a batch
- In the ReadySuite ribbon, click External Data > Data Volume to open the Volume Import wizard.
- On the Volume Setup page, enter or select the Path to the folder with the volume (or click Browse and navigate to it).
- To manually select the folders and files of the volume, clear Automatically scan and detect volume data.
- In the Additional scan settings section, select the types of Load Files to include in the import (DAT, CSV, Opticon, and IPRO).
- Use the Folder Options to specify folders where files may exist. When you click Data, Images, Natives, or Text, the Folder Options dialog box enables you to enter names of folders searched for volume files.
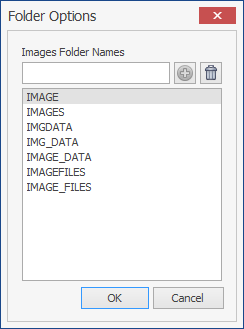
Enter the name of the folder you want searched in the [file type] Folder Names.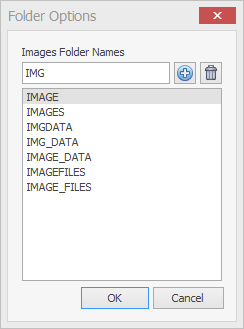
Click the Add icon to add the folder to the list, then click OK.
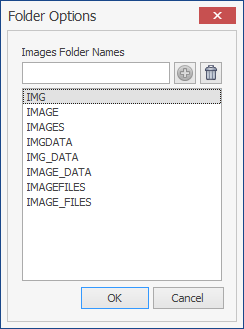
To remove a folder from the list, select it and click the Trash icon .
. - To allow duplicate document identifiers, select Duplicates.
- To find files inline with image files, select Inline Text.
- To append existing values, select Append and enter the separator.
- Click Next.
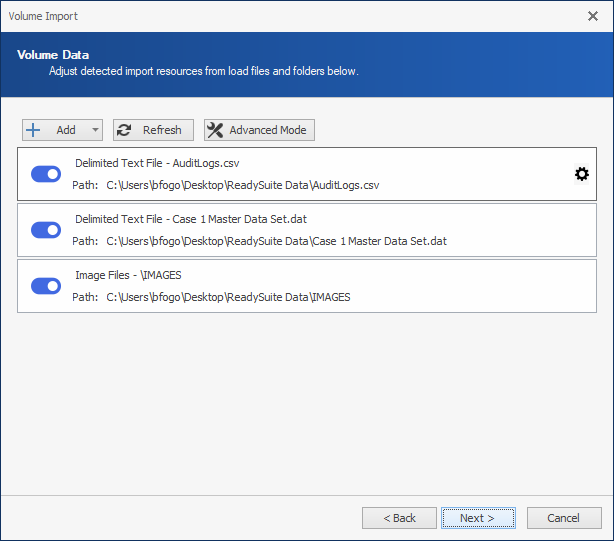
- On the Volume Data page, adjust detected volume import resources from the listed load files and folders by clicking the toggle to exclude.
To open a resource in Advanced Mode, click its gear icon .
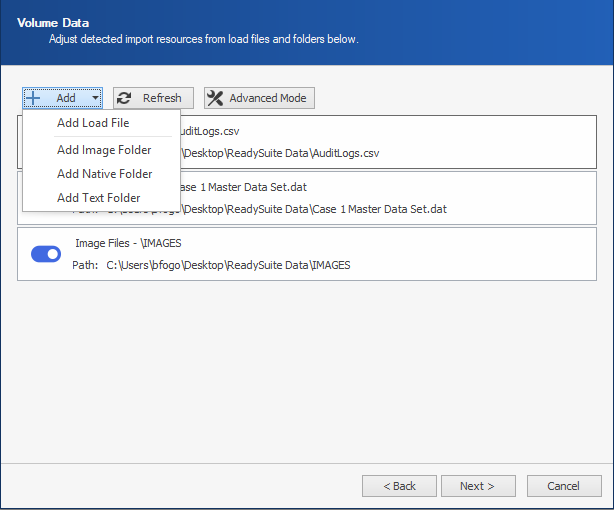
. - To add a file or folder, click Add and select to add a load file, image folder, native folder, or text folder, then select its location.
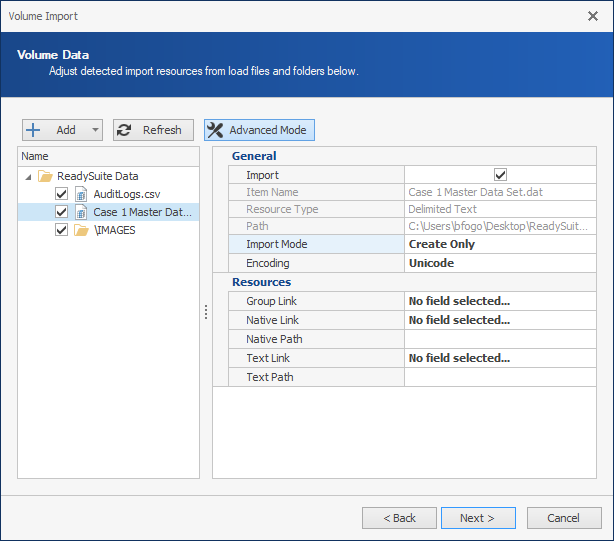
- Click Advanced Mode to view the contents of the volume path of the import. Select folders and files to include; clear to omit.
- Select a file or folder in the Name list to view its General and Resources information and edit if necessary. (One of the resources should have the Import Mode set to
Overlay Onlyand one should be set toCreate Only.) Completing the Resource information enables the verification of those items.
The Resources information includes the following and can be adjusted or removed: - Document ID: Document Link. Populates ReadySuite's internal DocID* field (document identifier or control number).
- Group Link: Populates the group/family related information.
- Native Link: Populates the native file.
- Native Path: Populates the absolute path of the native file link if it is a relative file path.
- Text Link: Populates the extracted text of the OCR path.
- Text Path: Populates the absolute path of the text file link if it is a relative file path.
- Click Next.
- On the Fields page, use the arrows to select from the Delimited Fields list the fields you want to import from the load file. The Source Field is the load file. The Destination Field is the field that is populated in ReadySuite. (For more information, see Import Fields).
- Click Start to parse the load files with their metadata, text and native files and load them in the ReadySuite project.
- On the Volume Report dialog box, in the Select Report list, choose the report you want to view:
- Summary Report: Includes items summaries (information from the load files), file summaries (information from the file structure), and validation results.
- Missing Files: Lists any page, native, or text files missing from the load file.
- Orphaned Page Files: Lists any files that do not link to any files referenced in the load file.
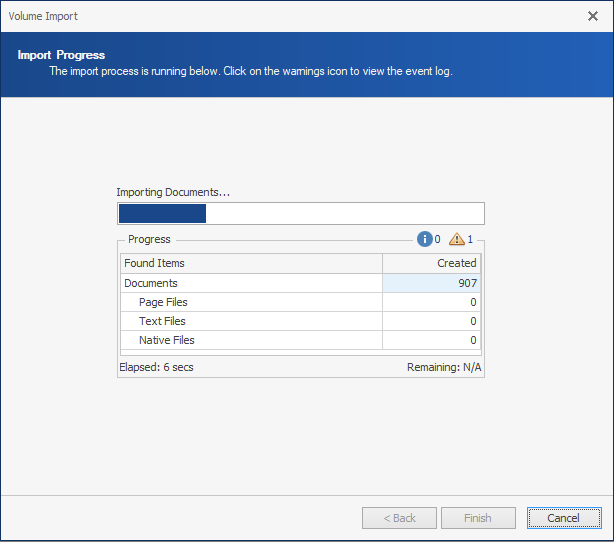
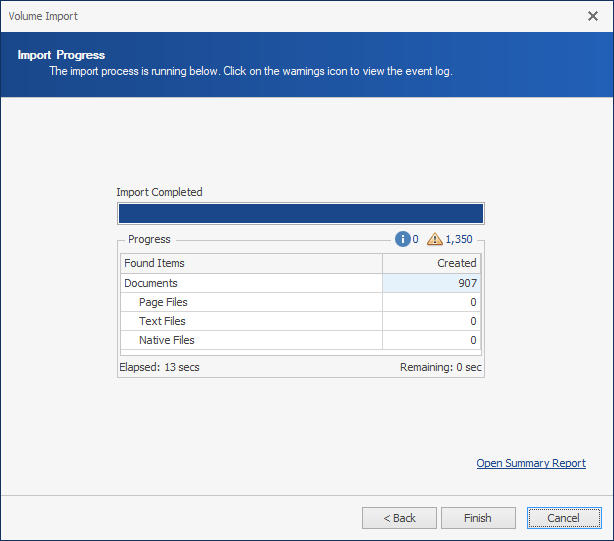
- On the Import Progress page, view the details of the import process.
- Click Finish.

Note: Folder Option settings can also be managed using the Volume Detection section of the Volume Import tab on the ReadySuite Options dialog box.
Note: Link fields in the Resources section can also be managed using the Volume Import tab on the ReadySuite Options dialog box.
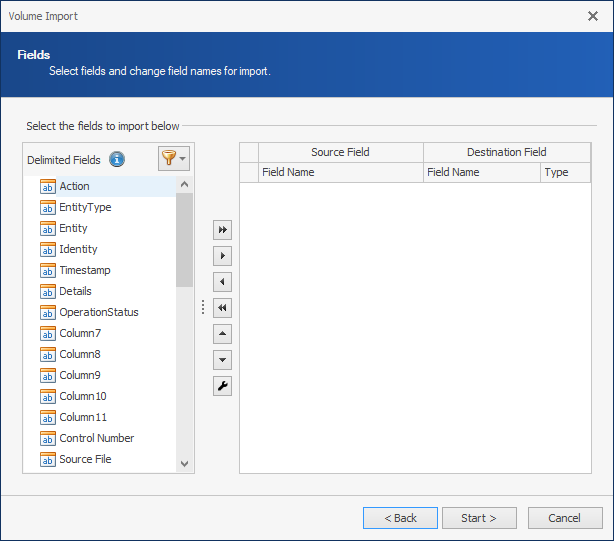
Note: Click the Filter icon  to select from a limited set of fields, such as a saved search.
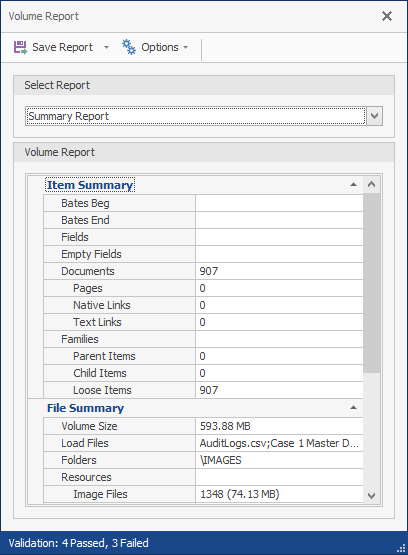
To change the display of the file size in the report, click Options > File Size Display and select the desired file size.
To save the report, click Save Report > Save All Reports and complete the Save As dialog box.
Note: If warnings exist, the Warnings icon ![]() displays the number of instances. Click to view the Event Log for details.
displays the number of instances. Click to view the Event Log for details.
The imported volume files are listed in the Document Grid View.
