Adding Dynamic Fields
The following dynamic fields can be added to the project (using Field Setup) or export file (using the Import Fields page on various wizards):
-
Date Field: Can be used to merge, split, or re-format the values of existing date and time fields.
-
Group Field: Adds a delimited or first non-blank value from a selection of one or more existing fields.
-
Static Field: Adds a column of the same data to each row in the Document Grid View. (This information cannot be edited).
-
Script Field: Targets a script to a single field and manipulate the value of the field according to the added scripting logic. (Example: A scripted field named Record Type could note if the document is a parent or an attachment, or if the document is an email or an attachment to an email, or if the document is a loose document that is part of a folder structure).
Note: Script Fi
Like data fields, dynamic fields appear as columns in the Document Grid View. Icons appear in the column heading of dynamic ![]() and script fields
and script fields ![]() for easy identification.
for easy identification.
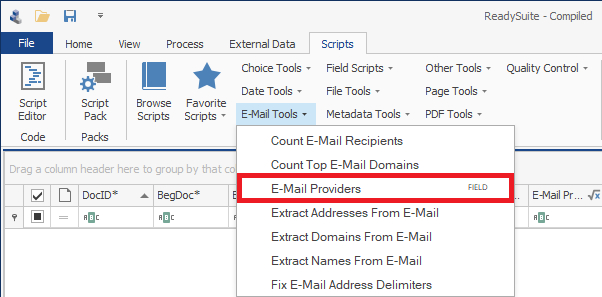
Script Fields are easily accessible and identifiable from on the Scripts menu of the ReadySuite ribbon, as they have FIELD next to their name.
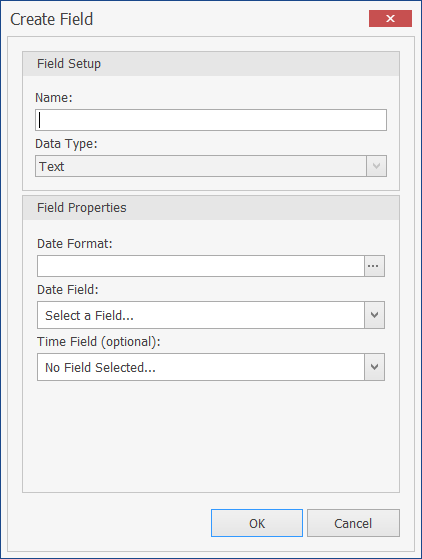
To add a dynamic Date field using Field Setup
- In the ReadySuite ribbon, click Home > Field Setup.
- On the Field Setup dialog box, click the drop arrow right of the Add Fields tab, select Dynamic Field > Date Field.
- On the Create Field dialog box, in the Field Setup section, enter the Name and select the Data Type.
- In the Field Properties section, select from the Date Format. (Click
 to open the Mask Editor).
 - Select the Date Field.
- If you choose, select the Time Field (optional).
- Click Ok.
- View the new date field in the Field Setup list.
- Close the Field Setup dialog box and view the new date field in the Document Grid View.
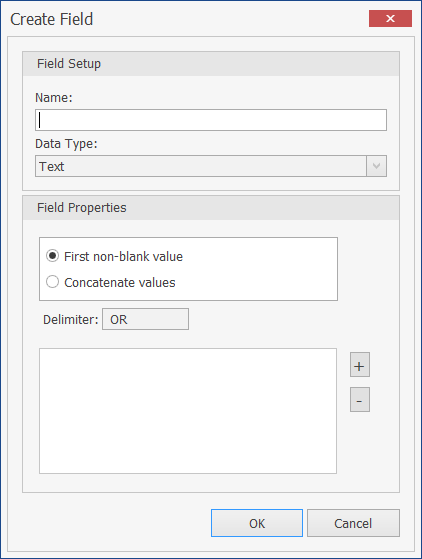
To add a dynamic Group field using Field Setup
- In the ReadySuite ribbon, click Home > Field Setup.
- On the Field Setup dialog box, click the drop arrow right of the Add Fields tab, select Dynamic Field > Group Field.
- On the Custom Field dialog box, in the Create Group Field section, select from the following:
- First non-blank value (Delimiter:
OR) - Concatenate values (Delimiter:
;) - Click the plus button
 to select the Date Fields, Page Fields, and Text Fields you want to group. (Click the minus button
  to remove fields from the group.
 - Click OK.
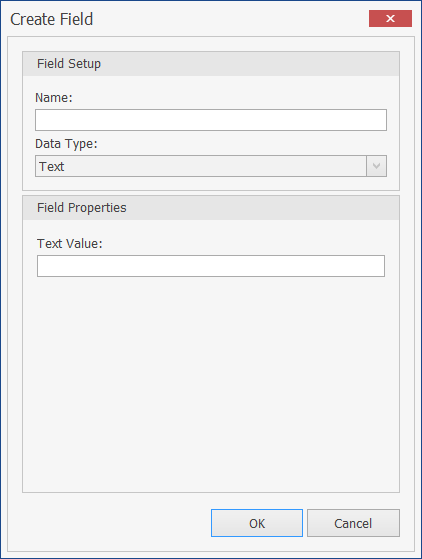
To add a dynamic Static field using Field Setup
- In the ReadySuite ribbon, click Home > Field Setup.
- On the Field Setup dialog box, click the drop arrow right of the Add Fields tab, select Dynamic Field > Static Field.
- On the Custom Field dialog box, in the Field Setup section, enter the Name.
- Select the Data Type.
- In the Field Properties section, enter the Text Value.
- Click Ok.
- View the new static field in the Field Setup list.
- Close the Field Setup dialog box and view the new static field in the Document Grid View.
To add a dynamic Script field using Field Setup
- In the ReadySuite ribbon, click Home > Field Setup.
- On the Field Setup dialog box, click the drop arrow right of the Add Fields tab, select Dynamic Field > Script Field.
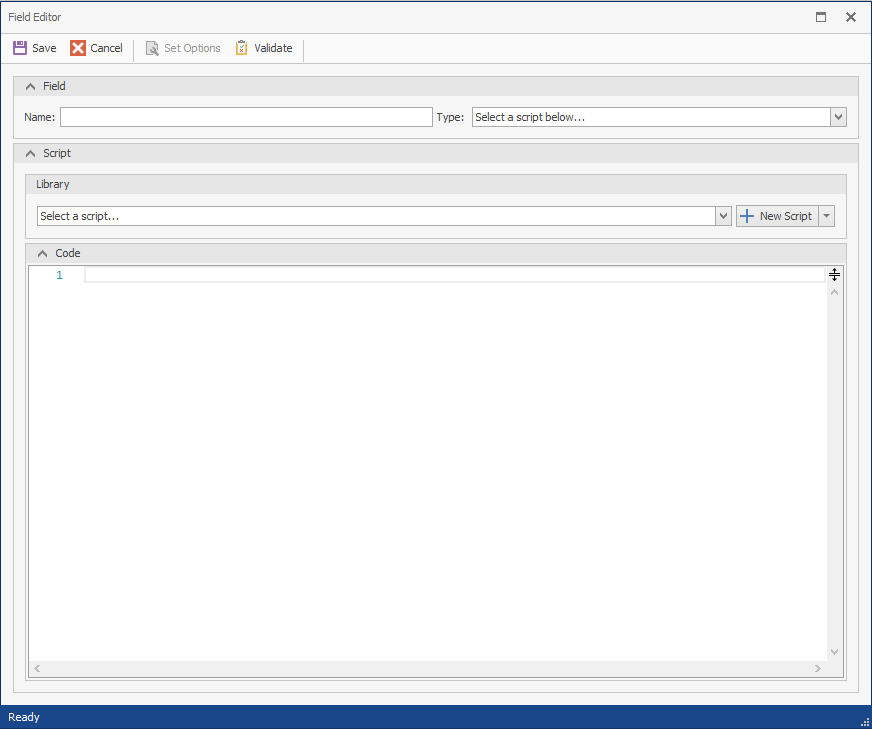
- In the Field Editor dialog box, in the Field section, enter the Name and select the Type (currently
Text) of the script field. - In the Script section, select from an existing script or click New Script
 to create an editable script template.
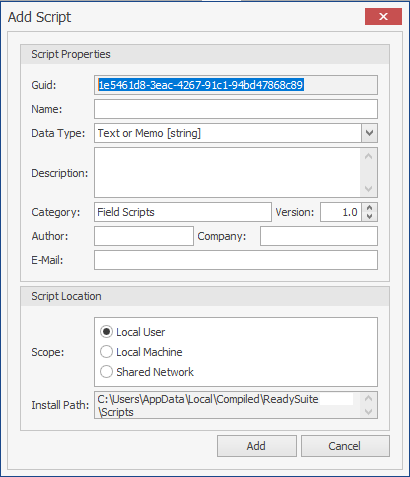
 - On the Add Script dialog box, in the Script Properties section, enter the following:
- Guid: Provided automatically and cannot be edited.
- Name: Name of the Script field.
- Data Type: Field type of script.
- Description: Overview of the script's function.
- Category: Category of new script. Categories appear in the ReadySuite ribbon on the Scripts tab in the Library section.
- Version: Version number of the script.
- Author: Person who created the script (optional).
- Company: Company of the person who created the script (optional).
- E-Mail: Email of the person who created the script. (optional).
- In the Scope section, select the range of availability of the script:
- Local User: Available only to current user.
- Local Machine: Available only to users of the current machine.
- Shared Network: Available to all users on the ReadySuite network.
- In the Install Path, view the path to the script location based on the Scope.
- Click Add.
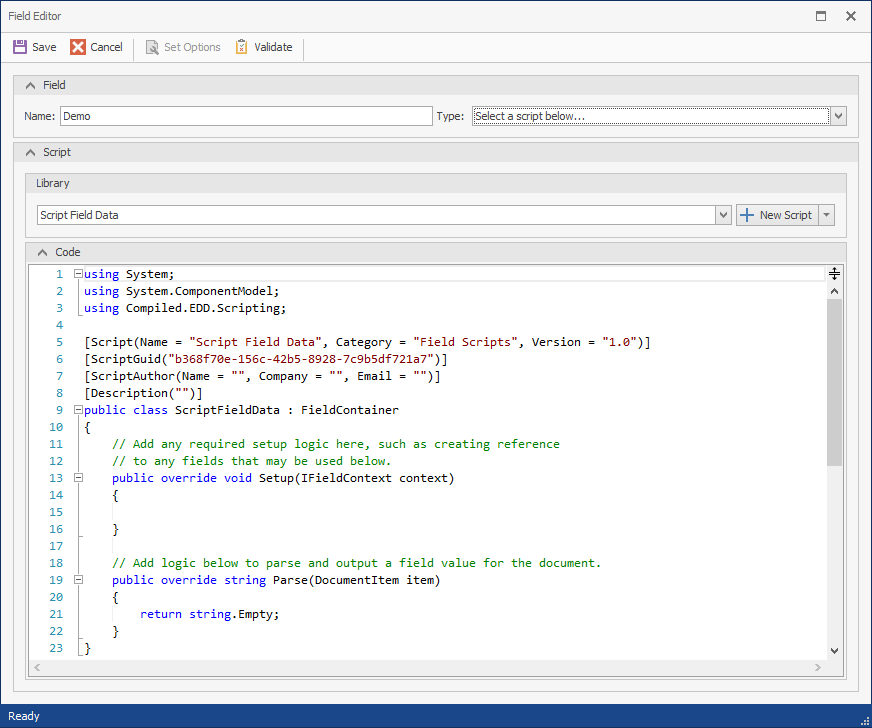
- View the new script in the Library drop list.
- Edit the template script code in the Code section as necessary.
- Click Save.
To update the options for a scripted field
- In the ReadySuite ribbon, click Home > Field Setup.
- On the Field Setup menu, click Edit Field.
- On the Field Editor menu, click Set Options.
- On Script Options dialog box, update the options as necessary and click Close.
Note: Depending on how the field or script was modified, the Script Options dialog may need to be closed more than once.
To add a scripted field from the scripts library
- In the ReadySuite ribbon, click Home > Field Setup.
- On the Field Setup dialog box, click the drop arrow right of the Add Fields tab, select Dynamic Field > Script Field.
- On the Field Editor dialog box, in the Script section, open the Library drop list and select field script you want to run.

To reload the script library
-
On the Field Editor dialog box, click the New Script drop list and select Reload Library.