Batch Import
Multiple load files can be imported into ReadySuite with the Batch Import wizard.
To import a multiple load file as a batch
- In the ReadySuite ribbon, click External Data > Batch Import to open the Load File Import wizard.
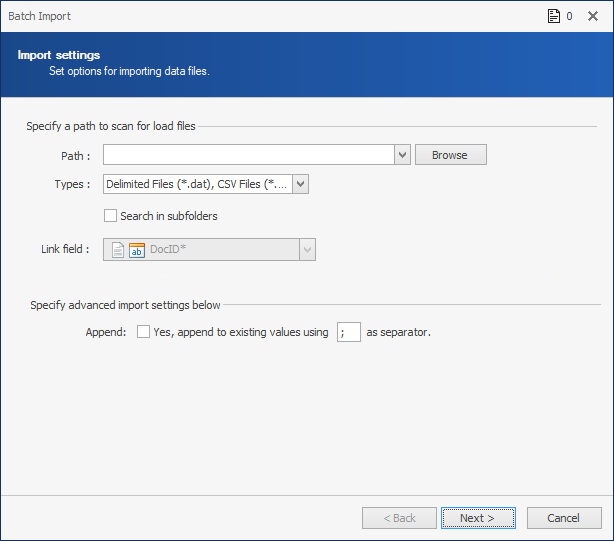
- On the Import Settings page, enter or select the Path to the folder with the load files (or click Browse and navigate to it).
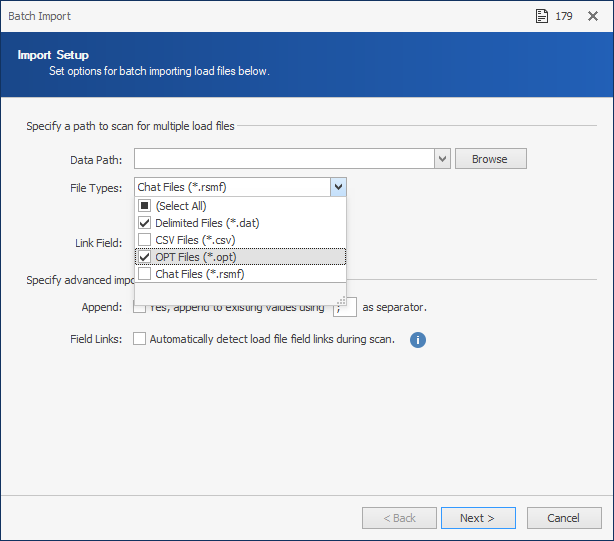
- Click the Types down arrow and select the types of files in the folder Path you want to import.
- To include folders beneath the root Path folder in the scan process, select Scan subfolders.
- To append existing values, select Append and enter the separator.
- Confirm the Link field selection used when overlaying data (default value
DocID). - To automatically detect load files field links during scan, select Field Links.
- Click Next.
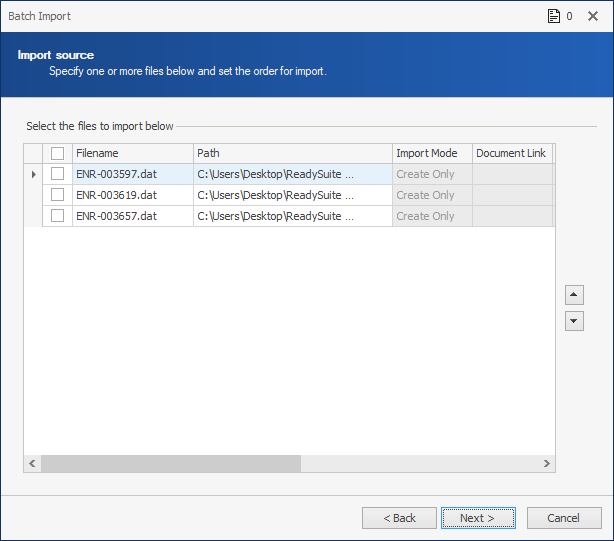
- On the Import source page, select the load files you want to import.
- Select the Import Mode for each load file you want to import from the following:
- Create Only: Allows only new load files to be added to the ReadySuite project.
- Overlay Only: Requires load files to overlay an existing load file in the ReadySuite project. (Default value for Chat files.)
- Create/Overlay: Adds new load files and those matching an existing load file in the ReadySuite project.
- Select the Document Link for each load file you want to import to indicate the field to use as the document identifier.
- Select the Group Link for each load file you want to import to indicate if there is a Parent ID or Group ID to the Document Link.
- Select the Native Link for each load file you want to import to indicate the field from the import load file to populate the FilePath* field and associate a native file to the document.
- Select the Native Path for each load file you want to import to indicate the path where the native files are in relation to the relative path from the selected Native Link field.
- Select the Text Link for each load file you want to import to indicate the field from the import load file to populate the Text FilePath* field and associate a text file to the document.
- Select the Text Path for each load file you want to import to indicate the path where the text files are in relation to the relative path from the selected Text Link field.
- Select the Image Path for each load file you want to import to indicate the path where the image files are in relation to the relative path from the selected Image Link field.
- Click Next.
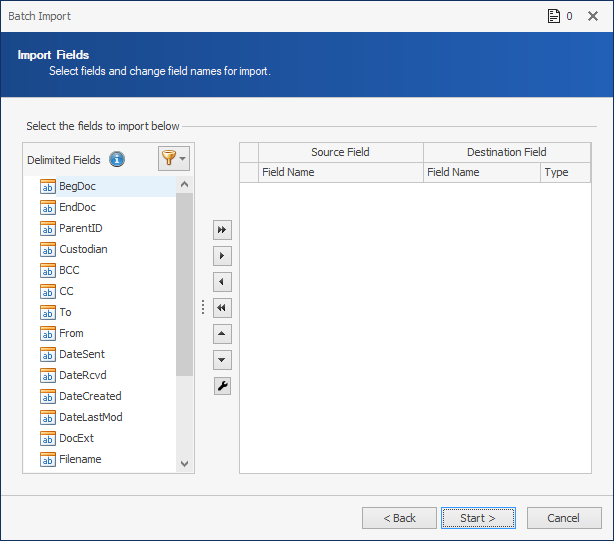
- On the Import Fields page, use the arrows to select from the Delimited Fields list the fields you want to import from the load file. The Source Field is the load file. The Destination Field is the field that is populated in ReadySuite. (For more information, see Import Fields).
- Click Start to parse the load files with their metadata, text and native files and load them in the ReadySuite project.
- On the Import Progress page, view the details of the import process.
- Click Finish.
Note: Click the Filter icon  to select from a limited set of fields, such as a saved search.

Note: If warnings exist, the Warnings icon ![]() displays the number of instances. Click to view the Event Log for details.
displays the number of instances. Click to view the Event Log for details.
Note: Invalid data is greyed out and flagged with an error icon. Invalid files must be corrected in order to be imported.
The imported load files are listed in the Document Grid View.
