Preprocessing Images
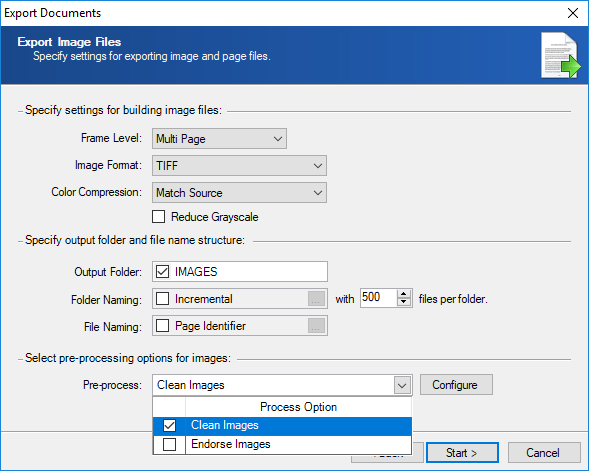
Images can be endorsed and cleaned from the Export Image Files page.
To export endorsed images
- On the Export Image Files page of the Export Documents wizard, in the Pre-process list, select
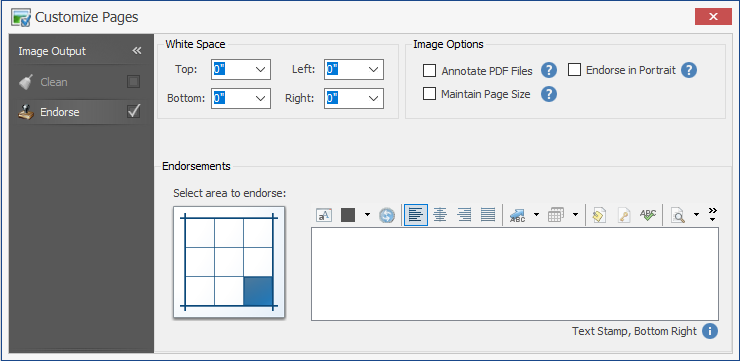
Endorse Imagesand click Configure. - On the Customize Page dialog box, use the Endorse tab to select the White Space location, Image Options, and area of the Endorsement.


Example
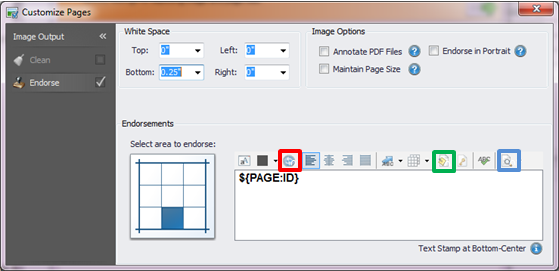
We want to endorse the control number (in Arial, bold, size 11 font) at the bottom middle of the page, with 0.25” white space. First, change the bottom white space value by selecting it from the dropdown menu.

Then, in the “Endorsements” section, click on the bottom middle square (shown in red in the above figure). Then set the font by clicking on the button highlighted in green in the above figure. Then, to get the page number, click on the button highlighted in blue in the above figure.
The “Customize Pages” section should look like this:

To clean images
- On the Export Image Files page of the Export Documents wizard, in the Pre-process list, select
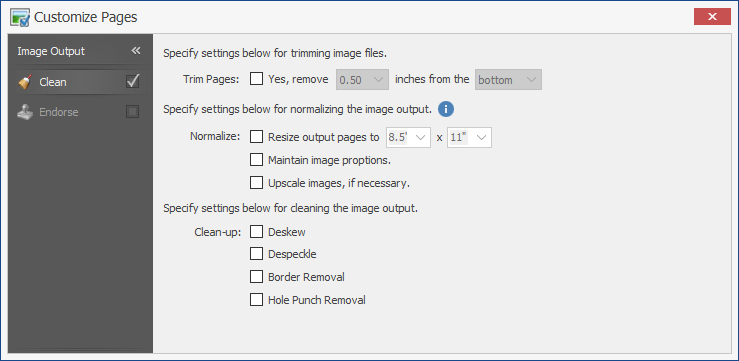
Clean Imagesand click Configure. - On the Customize Page dialog box, use the Clean tab to specify settings for:
- Trimming image files.
- Normalizing the image output.
- Cleaning the image output

