Nebula
Integration with the Nebula eDiscovery platform enables you to retrieve coding and field metadata directly from Nebula. With this feature you can perform production quality control, generate load files, and perform advanced data manipulation for overlays in Nebula or other tools.
Example
You could open a production volume in ReadySuite and automatically run quality control and validation steps, then connect directly to Nebula with ReadySuite's Nebula Import wizard to pull in coding fields (such as Responsiveness, Privilege, Markups, and Confidentiality) to assist the production quality control workflow.
To import a load file
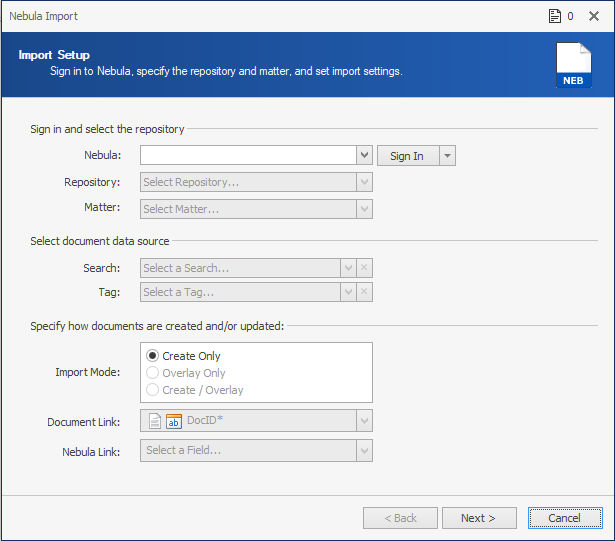
- In the ReadySuite ribbon, click External Data > Platform Source > Nebula to open the Nebula Import wizard.
- On the Import Setup page, select the Nebula connection you want to use.
If this is the first time you are connecting to Nebula, click Sign In > Manage Credentials to open and complete the Manage Credentials dialog box.
If you have previously signed into Nebula, click the Nebula down arrow and select from previous Sign In instances.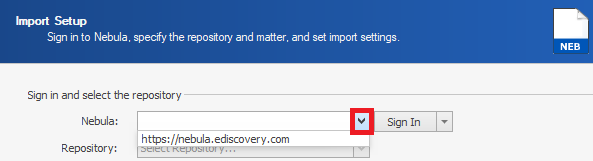
- Select the Repository you want to import from.
- Select the type of Matter you want to import from.
- Select the document data source from one of the following:
- Search: Select the saved search you want to import.
- Tag: Select the tagged documents you want to import.
- Select the Import Mode for each load file you want to import from the following:
- Create Only: Allows only new load files to be added to the ReadySuite project.
- Overlay Only: Requires load files to overlay an existing load file in the ReadySuite project.
- Create/Overlay: Adds new load files and those matching an existing load file in the ReadySuite project.
- Select the data field link overlay options from the following:
- Document Link
- Nebula Link
- Click Next.
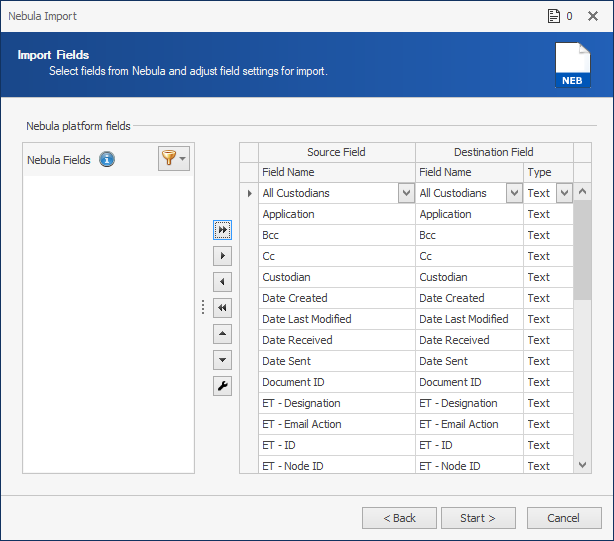
- On the Import Fields page, use the arrows to select from the Nebula Fields list the fields you want to import from the Nebula. The Source Field is the Nebula file. The Destination Field is the field that is populated in ReadySuite.
- Rename the Field Name and select the Type as necessary.
- Click Start.
- On the Import Progress page, view the details of the import process.
- Click Finish.
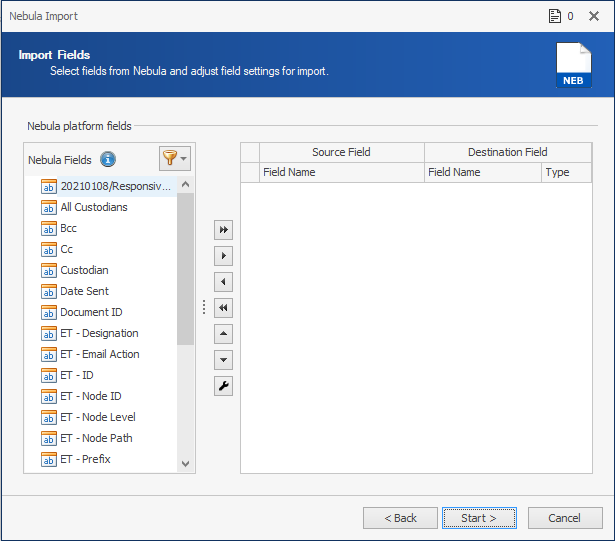
Note: Click the Filter icon  to select from a limited set of fields, such as a saved search.
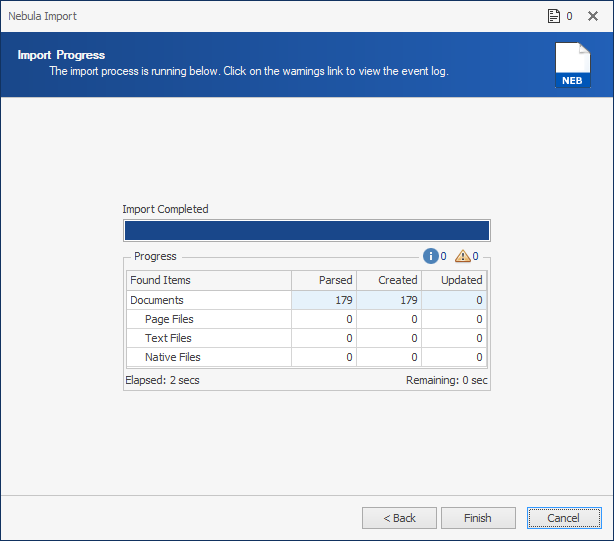
Note: If warnings exist, the Warnings icon ![]() displays the number of instances. Click to view the Event Log for details.
displays the number of instances. Click to view the Event Log for details.
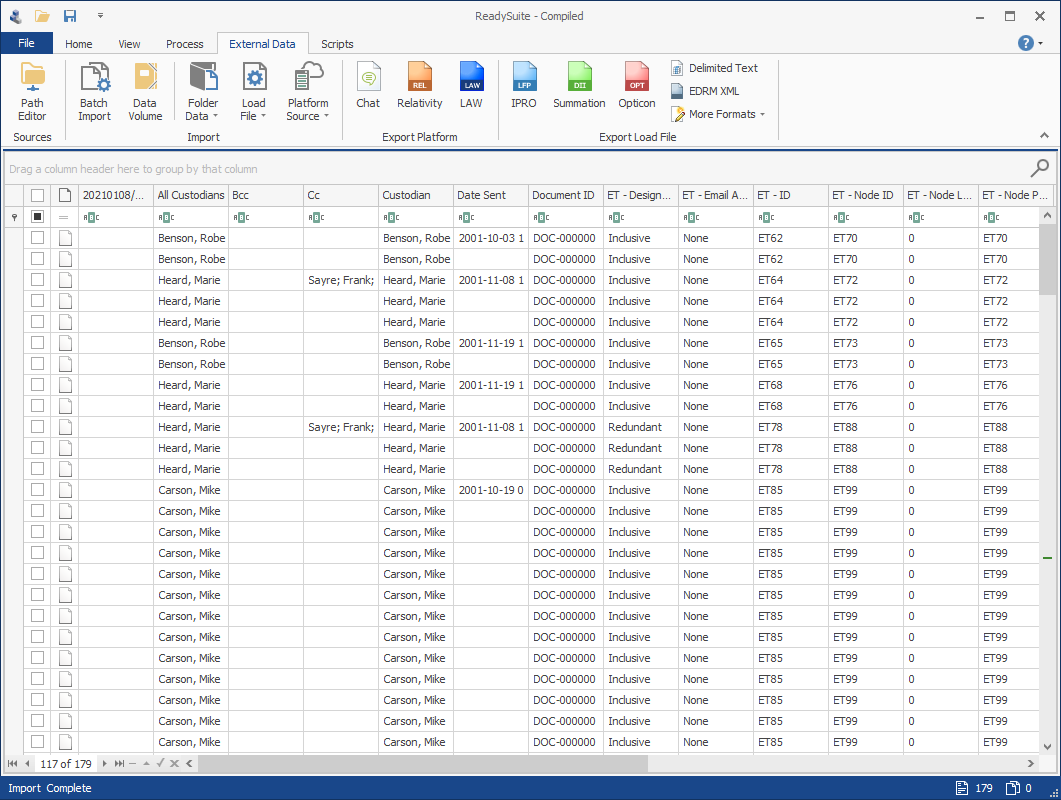
The documents imported from Nebula are listed in the Document Grid View.
Managing Credentials for Nebula
With the Manage Credentials dialog box, you can add new connections to Nebula, as well as update or delete existing connection credentials.
Username and password credentials can be set up for Relativity Server.

Two factor authentication to RelativityOne or Relativity Server can be implemented by configuring Relativity and ReadySuite to use OAuth2 authentication.

To create a new Nebula connection with Aegis credentials
- In the Credential Source section, click
 .
. - On the Manage Credentials dialog box, in the Credentials Source drop list, select
New Connection. - In the Connection Settings section, enter the URL of the Nebula Server connection path.
- In the Credentials section, in the Provider drop list, select
Aegis. - To verify the information on the Manage Credentials dialog box can connect to Nebula , click Test Connection.
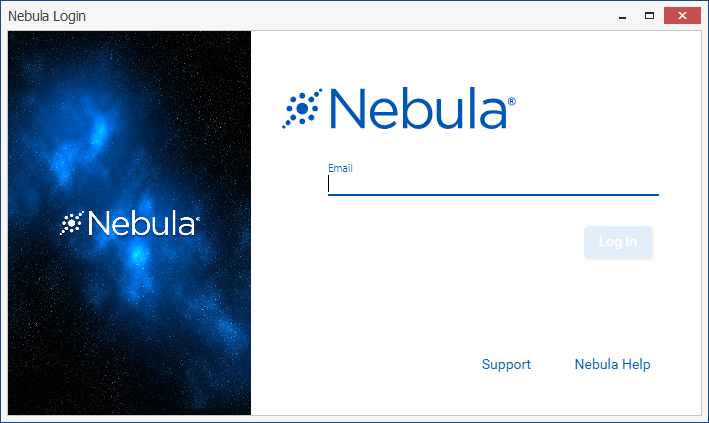
- On the Nebula Login page, type your Email.
- Click Log In.
- Enter your Password. (Click
 to View password or
  to View password.)
 - To refresh the Log In page enter a different email address, click Change Email.
- Click Log In.
- If connection test was successful, click Save.
Note: The path should end with the domain. Do not include any trailing slashes after that.
Example
Correct
https://nebula.ediscovery.com
Incorrect
https://nebula.ediscovery.com/Nebula
Note: The minimum password length is 8 characters and the maximum 50.
To modify the details of an existing connection
- In the Credential Source section, click
 and select the connection you want to update.
 - Change the contents for the Connection Settings and Credential sections as required.
- Click Save.
To delete an existing connection
- In the Credential Source section, click and select the connection you want to delete.
- Click
 .
. - On the Delete dialog box, click Delete.