Import Setup
The first page of all load file import wizards is the Import Setup page, where you:
- Browse for the load file and volume folder to import.
- Specify how documents are created and/or updated.
- Select advanced import settings.
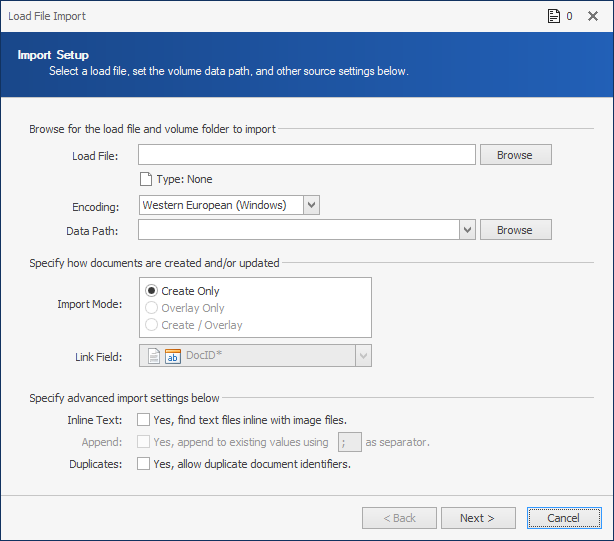
To complete the Import Setup page
- On the Import Setup page, enter or select the folder containing the load files in Load File (or click Browse and navigate to it).
- Select the Encoding to be used.
- Enter or select the Data Path (or click Browse and navigate to it).
- Select the Overwrite Mode to indicate how load files are created and/or uploaded:
- Create Only: Allows only new load files to be uploaded to the ReadySuite project.
- Overlay Only: Requires load files to overlay to an existing load file in the ReadySuite project.
- Create/Overlay: Enables new load files and those matching an existing load file in the ReadySuite project.
- Select a Link Field to enable overlaying. By default, the link field is set to DocID* which matches the DocID* column on the Document Grid View. Most useful after an import (merging load files together). The DocID* field always has a value populated in ReadySuite.
- Specify any advanced import settings you want applied from the following :
- Inline Text: If you are importing image files with your load file and you also want ReadySuite to find any inline text files (text file name matching image file name), enable this option.
- Append: Select to enable appending existing values using a [selected character] as a separator.
- Duplicates: When enabled, duplicate values are processed, and can be overlaid onto existing records. If a duplicate document identifier value is found reading the import file, and this option is cleared, a warning is logged to identify the duplicate.
- Click Next.